


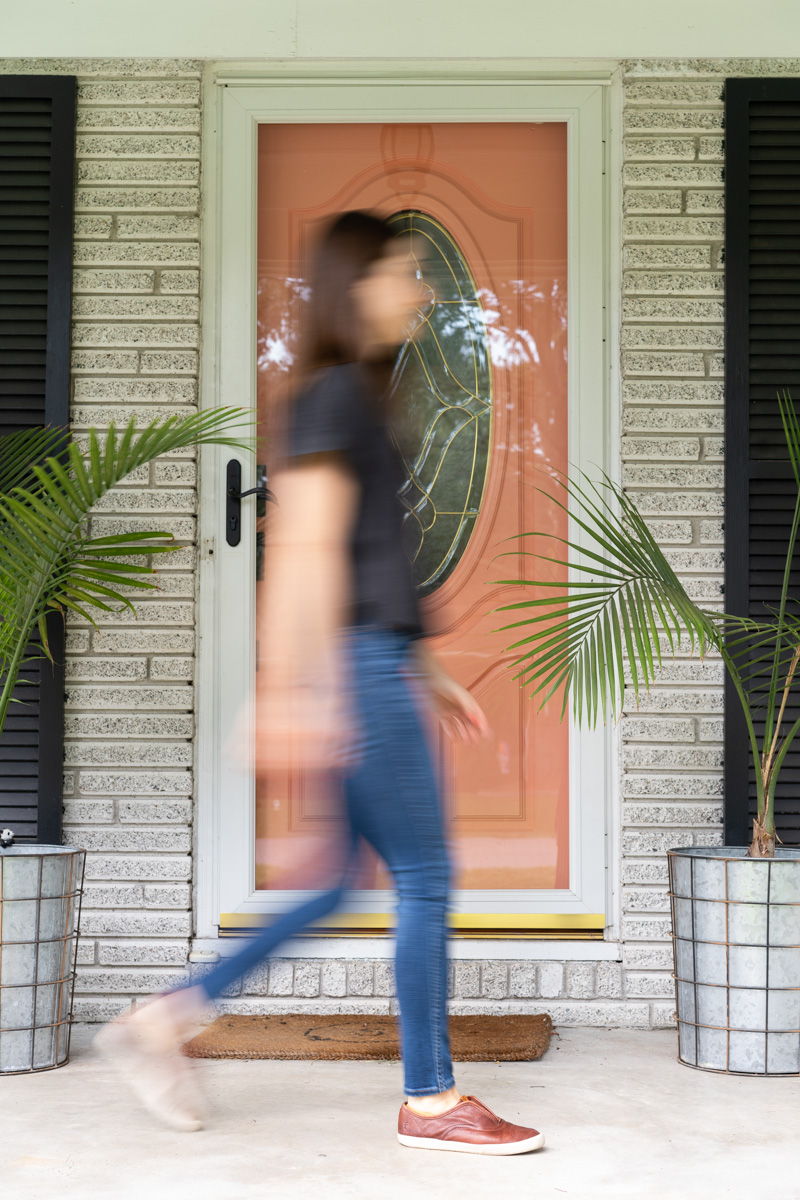
Have you tried to teach yourself photography and end up feeling totally frustrated and confused? You may have bought a fancy DSLR camera, only to keep grabbing your iPhone camera rather than your new camera! I know from years of experience that learning photography can be incredibly frustrating, but so rewarding! I created a beginner’s guide to photography for you (cheat sheet included!) so that you can become more comfortable with your camera. Whether you’re learning photography to document your memories, take up a new hobby, or create a new creative career, this beginner’s guide to photography is made for you!
In this post, we’ll talk about the three main settings you’ll need to master on your camera and how they work together to create your images. I plan to write more beginner’s guide to photography posts in the near future, so please comment with questions or send them to abbymurphyphoto@gmail.com. I’d love to hear from you!
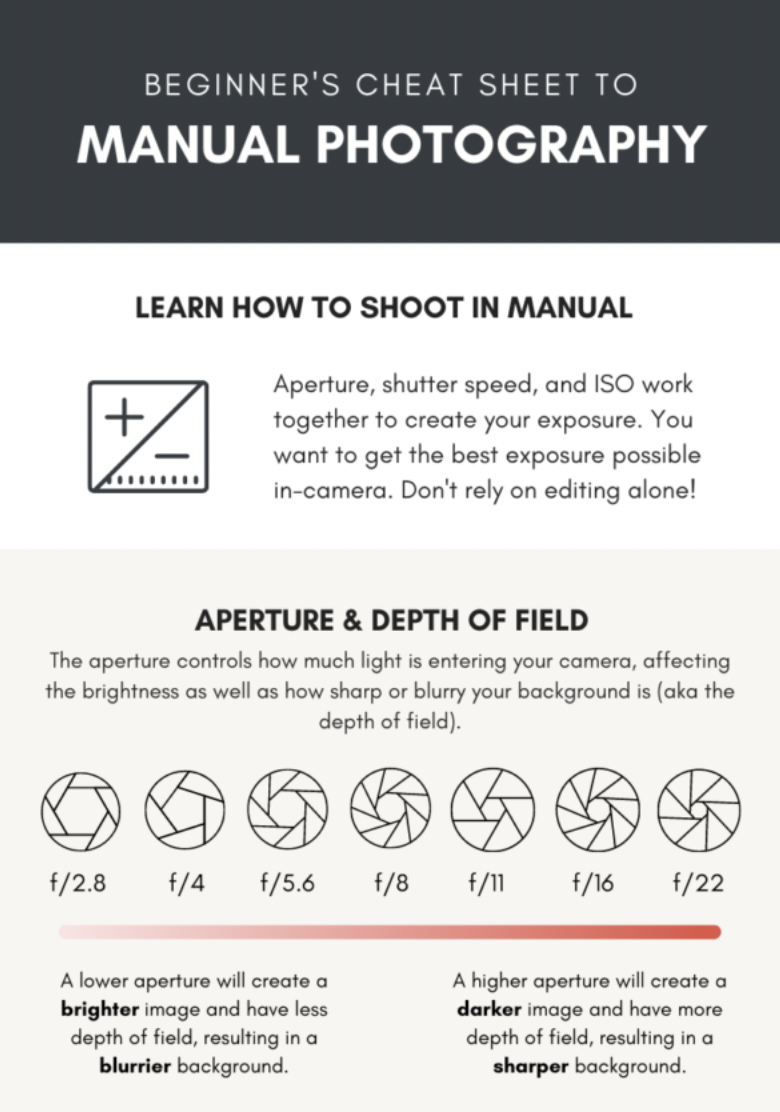
Pin this: Beginner’s Guide to Photography Cheat Sheet
I created a cheat sheet for you as you start learning your camera and experimenting! After you’ve read through the post and learned about your essential camera settings, refer back to this when you get stuck. I suggest starting a Pinterest board with your favorite photography inspiration and pinning this cheat sheet so you’ll never be without it!

My Start with Photography
When I was thirteen, I decided that I wanted to buy a DSLR camera and learn how to use it. I mowed the lawn all summer to save up for my first camera, a Nikon D40. Like most people, I didn’t take the time to learn the fundamental basics. I shot on Auto and took MANY photos of flowers and my dog! I think that’s a necessary step in the process of learning photography, and nearly everyone starts there!
When I was in high school, I was lucky enough to have an art teacher that was a film photography devotee. It was the first time I really learned the ins and outs of photography without the distraction of digital settings. We went back to basics, learning how an image is exposed, and what the settings meant on the camera.
Learning film photography allowed me to strip away the distracting technology on a DSLR and focus on the simple fundamentals of photography. I always say I don’t know how I’d ever truly learn photography without learning on film first. But, if you strip away the overwhelming settings on digital cameras and focus on the fundamentals, you can gain a true understanding of how your camera works. Once you have a grip on the basics, you can experiment with your own photographic style.
What is Photography?
When you’re taking a photo, a light source such as the sun or a light must be illuminating your scene. Light rays reflecting in your scene will pass through your camera lens to make up the image you’re creating. Your lens takes in those light rays and collectively make up an inverted image. This focusing of the light results in a bright, clear image. Whatever type of lighting is in your scene, as well as the colors, will translate to your final image. The lighting conditions and tone of the subject or scene affect the exposure that is needed to create your ideal shot.
Aperture, shutter speed, and ISO work together to produce the correct exposure for your image. To learn how to use your camera, it’s essential that you understand what each setting does, and how you can adjust these settings together to create your final image. Let’s first learn the definition of each term, and then we’ll talk about how they work together!
Aperture and f/stop
The aperture acts like the iris of your eye. On the camera, we can adjust how open or closed it is, determining how much light is entering the camera. Therefore, we’re adjusting the brightness of the image. Each f/stop number on your aperture settings halves or doubles the amount of light entering the camera, and therefore the image brightness.
Aperture can be confusing because the terminology is a bit counterintuitive. A large f/stop corresponds to a lower number (such as f/2.8). A large f/stop is a larger opening and lets in more light. A small f/stop (such as f/22) is a smaller opening, letting in less light.
The aperture also affects the depth of field of your image. Depth of field refers to the area in front of and behind your subject that is in focus or not. A large aperture (for example, f/2.8) will give your image a shallower depth of field, resulting in a blurrier background. A smaller aperture will give your image a deeper depth of field, resulting in more of the image being in focus. Depending on your scene and subject, you can choose an aperture that most closely achieves the look you’re going for. For example, a small aperture like f/11 is a good choice for landscapes so that most of the scene is in focus.

How does aperture work with shutter speed & ISO?
Note: You can come back to this question after you’ve read through the rest of the post! You can see in the above example how I had to adjust my shutter speed and ISO as I changed my aperture. As I opened my aperture from f/1.8 to f/22, I was letting in less light. Therefore, I needed to lower my shutter speed and raise my ISO in order to let in more light. I kept my camera on a tripod so that I wouldn’t get camera shake when I lowered my shutter speed.
Shutter Speed
Shutter speed is the speed at which your aperture opens and closes to take your shot. It is the amount of time you’re allowing light to reach your film or the sensor in your camera. The shutter allows you to capture your image at the exact moment you want. The faster the shutter speed, the more you’ll capture motion.
As a general rule, you always want your shutter speed to be at least 2 stops higher than your lens focal length to prevent camera shake. For example, if you’re shooting with a 70mm lens, your shutter speed will need to be at least 1/125th of a second. You’ll want to take your subject’s movement and your lighting situation into consideration when choosing your shutter speed as well.
How does shutter speed work with ISO and aperture?
In this example, I increased my shutter speed for each new shot, letting in less light and freezing motion. I chose to keep the aperture the same in every shot. I increased my ISO to compensate for letting in less light with my shutter speed settings.
ISO
Your ISO setting is your camera sensor’s sensitivity to light. The higher the ISO setting, the more sensitivity to light. Therefore, your camera’s sensor can capture more information. You’ll want to choose the ISO setting that will best fit your shooting situation. If you’re photographing on a sunny, bright day, you’ll want to choose a lower ISO setting. If you’re shooting indoors or in a darker situation, you could go up to 1800 or 3200.
An increase in ISO also means more image noise, or grain. Luckily, if you’re shooting a dimly lit scene and you don’t have another light source, you can bump up the ISO a bit and smooth out the noise in the editing process. Grain can also be a stylistic choice, but it needs to be intentional.
How does ISO work with shutter speed & aperture?
The settings in the above examples are pretty extreme in terms of ISO, but I wanted you to clearly see the grain that comes with higher ISO settings. As you can see, as I raised my ISO, I had to increase my shutter speed to let in less light. A higher ISO setting will increase your camera’s sensitivity to light, and therefore you can increase your aperture or shutter speed to let in less light.
Modern digital cameras are so good these days with handling this grain, but it can soften and muddle your image. Even in low-light situations, I try not to shoot above 3200 ISO. If there’s not enough light in the scene, I’ll add a flash or another light source.
Start Shooting
The biggest tip I can give you with photography is to practice. Even as someone that took 3 years of photography in high school and majored in it in college, it took me so much practice to really understand and get the hang of the settings. Don’t put too much pressure on yourself to figure it all out at once. As you practice more and more, it will start to become second nature.
If you’re stuck on shooting in auto mode right now, try shooting in aperture priority or shutter priority next. With either your aperture or shutter speed locked, you can get more comfortable changing your other settings. Soon you’ll be able to transition into shooting manual!
Shooting in manual allows you to best represent the unique scene you’re photographing and ensure the best exposure. Your goal should always be to get the best exposure in camera first, and not to rely on post-processing and editing later on your computer.
I hope this beginner’s guide to photography was helpful! If you have any photography questions, I’m here for you. Comment on this post or email me at abbymurphyphoto@gmail.com. Happy shooting!


+ SHOW comments
Add a comment