


Looking for the best way to declutter, organize, and store your old family photos? If you’ve got overflowing boxes of 4×6 Kodak prints, film slides, and memorabilia gathering dust and don’t know where to start, this post is for you!
I know how overwhelming a project like this can feel. My mom and I tackled our entire family photo archive (thousands of prints!), and along the way, I picked up some helpful tips. In this post, I’m sharing our step-by-step process, photo organization ideas, favorite photo storage products, and a little encouragement to help get you started!
My Favorite Tools for Organizing Family Photos
Here’s what we’ll cover:
- Why organizing and safely storing your printed photos is worth it
- How not to get overwhelmed
- Your must-have photo organizing supplies
- Step-by-step: How to organize your photos
- How to store your photos safely + the solution I swear by
- How to organize memorabilia and other types of media
- How to scan and back up your printed photos
- Ways to enjoy your photos in everyday life
This post contains affiliate links, which means I may earn a small commission if you purchase through them (at no extra cost to you!). I only share products I truly love and recommend.

My Photo Organizing Story (And Why Organizing Your Photos Is Worth It)
Before we get into the step-by-step, here’s a quick look at my experience with organizing family photos and why it’s worth doing in the first place.
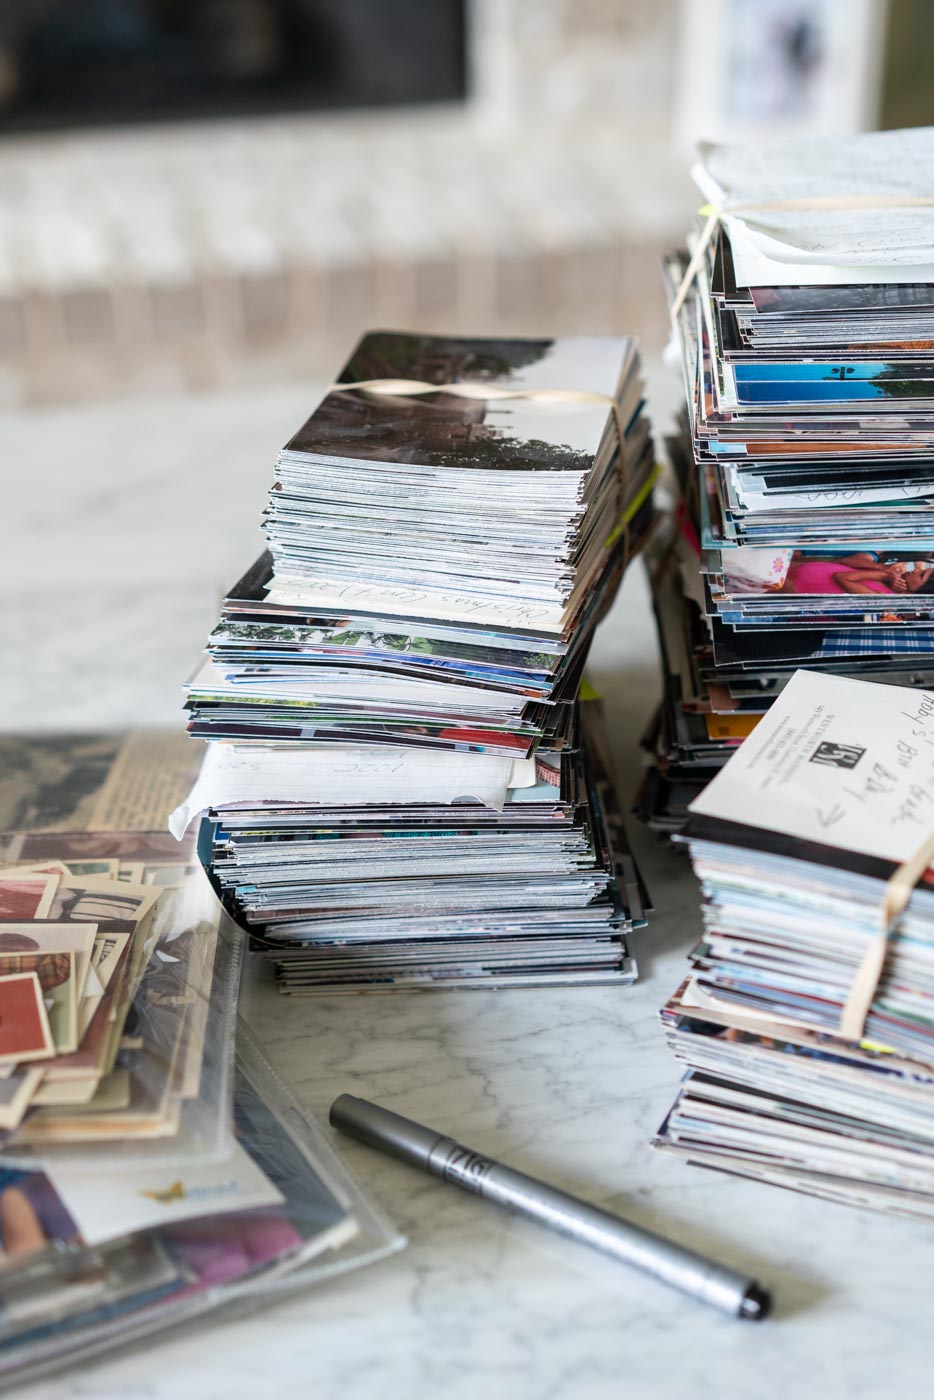
My mom and I started organizing our family photo archive a few years ago. After moving from Indiana to Atlanta, we found ourselves staring at storage bins and cardboard boxes brimming with drugstore prints, negatives, school pictures, slides, and things like newspaper clippings and memorabilia from family vacations and school events. I’m sure you can relate!
As a photographer, I loved the idea of sorting through every single piece of our family history. My mom? Not so much. Even for me, it was overwhelming at times. The process came with its fair share of headaches, but along the way, we figured out a few strategies and systems that made it a whole lot easier.
Organizing and storing your photos isn’t just a win for your inner neat freak. It’s essential for preserving your family’s memories. Photo prints, slides, negatives, and papers all deteriorate over time if they’re not properly stored. And if life happens, a flood, fire, or a big move could damage or displace them beyond repair. If you’re ready to finally organize and protect your photo collection, I’m here to guide you through it!
Getting Started Without Getting Overwhelmed
Before you even open a box of photos, get clear on your why. What’s your reason for tackling this project? Maybe you want to protect your photos from damage, create an album for a loved one, or make sure your memories are preserved for the next generation. Whatever your goal, keep it in mind. It’ll help you stay motivated when organizing your photos feels overwhelming. If your archive includes hundreds or thousands of photos (like ours did), it will test your patience!
The key is to set realistic expectations from the start. This isn’t a one-afternoon project. It might take months to feel truly “done,” and that’s totally normal! To avoid getting overwhelmed, break the process into smaller, manageable goals.
One of the best (and most distracting) parts of this project is reminiscing. You’ll stumble across hilarious haircuts, forgotten trends, and favorite memories. It’s truly the most fun part! Just be mindful of how much time you spend strolling down memory lane. Once everything is organized, you’ll be able to flip through whenever you’d like.
Organizing your photos is doable, and next, I’ll walk you through simple steps to make it feel way less daunting.

Gather Your Photo Organizing Supplies
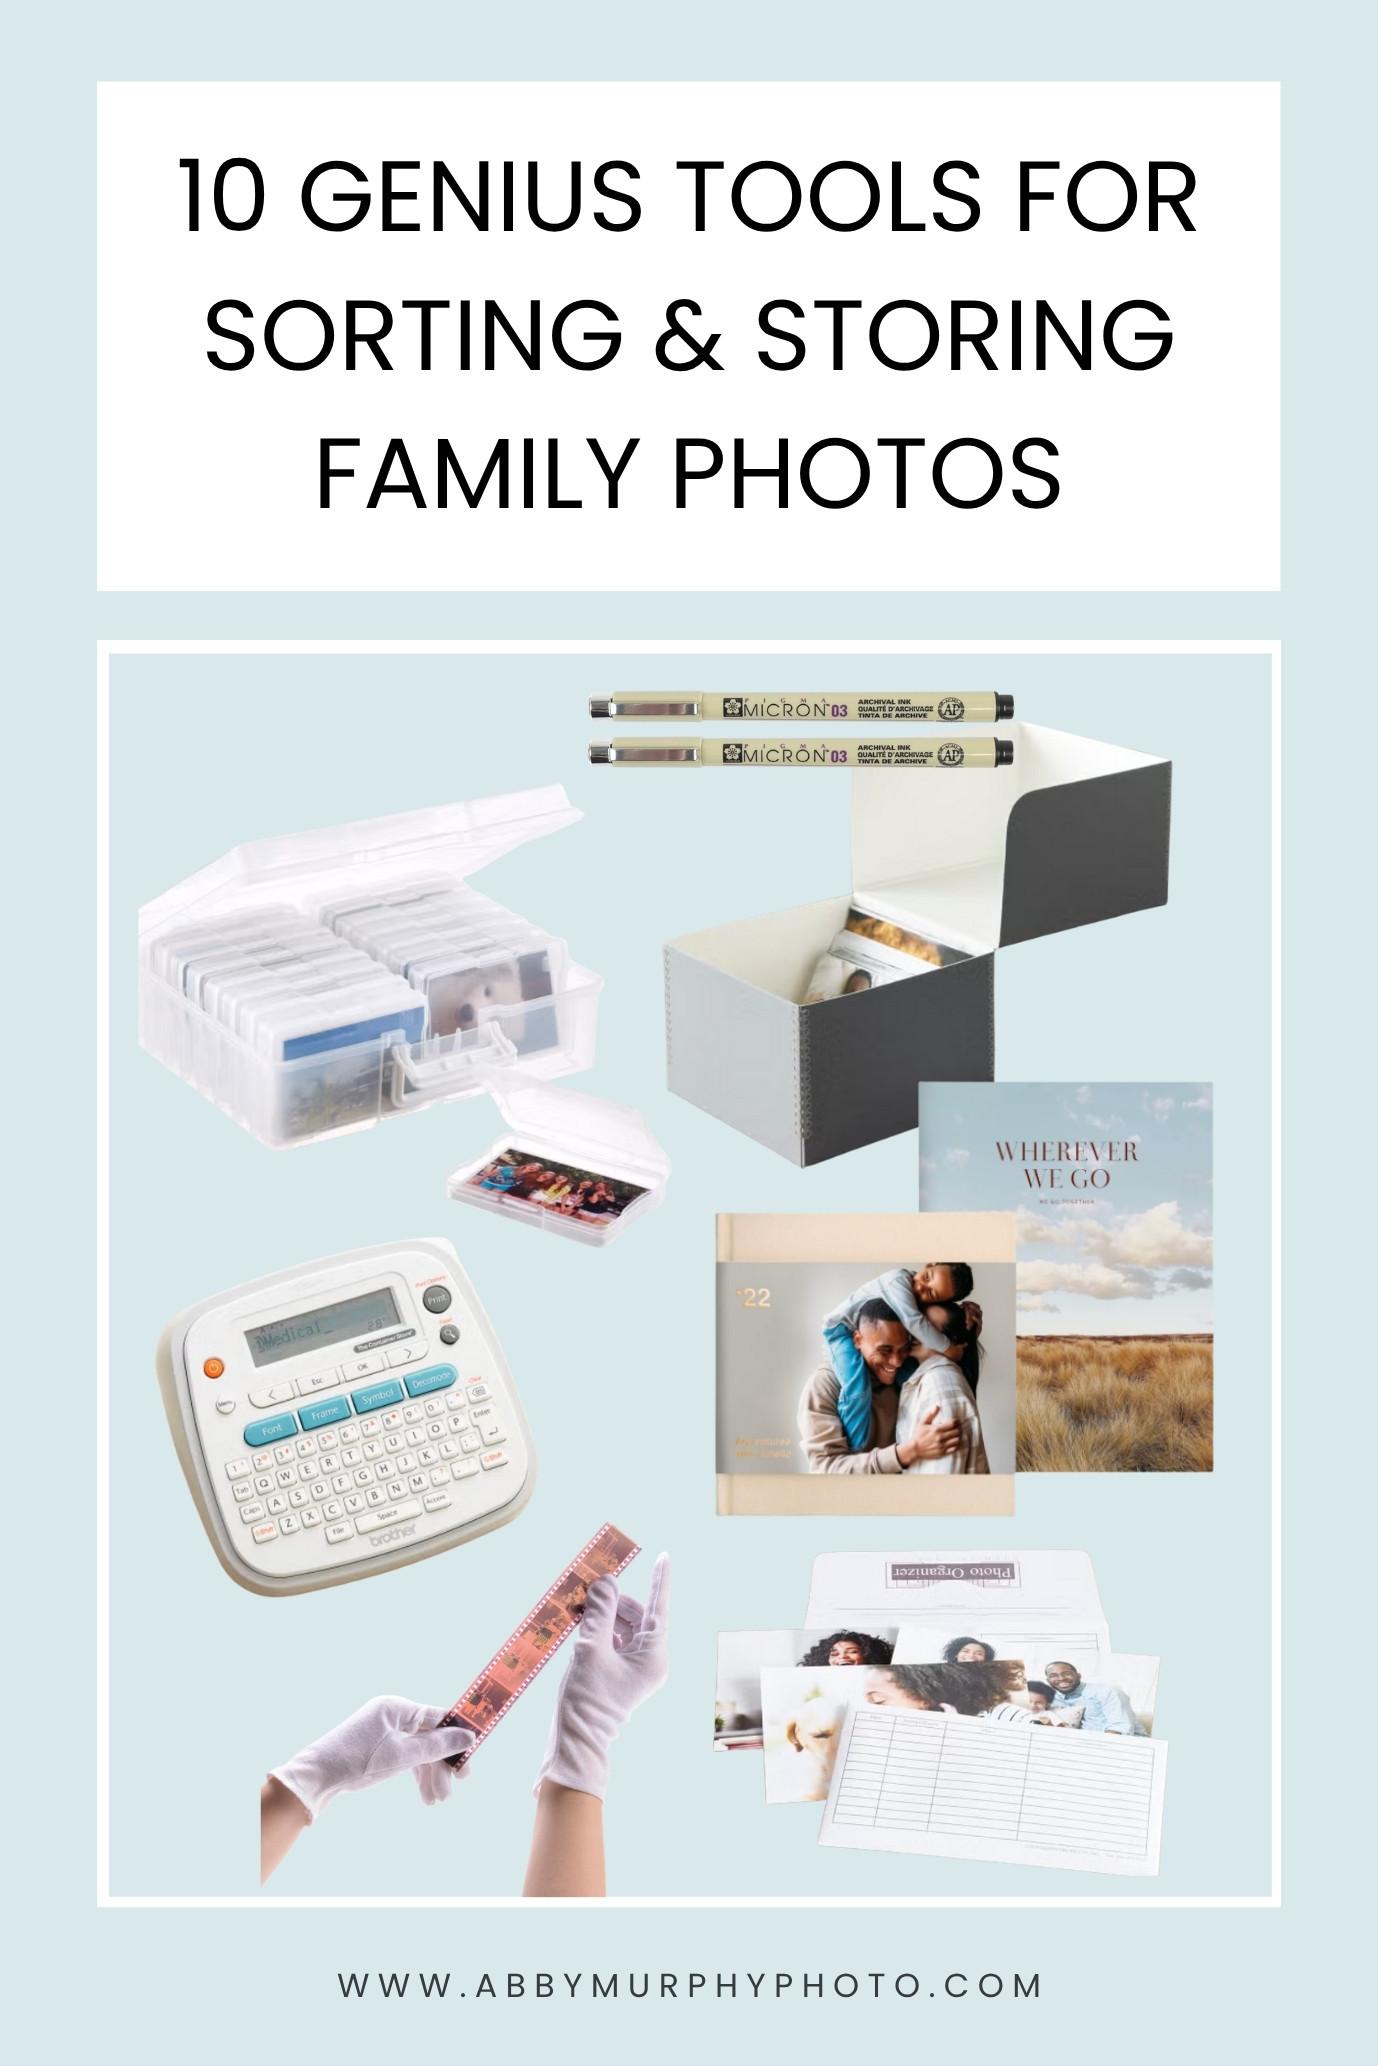
To organize your family photos efficiently and safely, you’ll want to have the right tools from the start. Look for anything labeled archival, acid-free, or photo-safe. These materials will help preserve your photos long-term. Here’s a checklist of essentials to have ready:
- Index cards– Great for labeling categories or time periods as you sort
- Photo safe pen– For writing on labels or the backs of photos without damage
- Archival clear photo sleeves or photo storage envelopes– These are great as a temporary storage solution while you’re figuring out your final system
- Acid-free photo storage box– My absolute favorite print storage boxes! These are the exact ones I use and love (Jump to where to buy)
- Cotton gloves– Oils from your fingers can degrade photos over time. If you don’t have gloves, be sure to wash your hands and handle prints by the edges
- Label maker– The easiest way to keep boxes, envelopes, and sleeves clearly labeled so you can find what you need fast. I use mine for everything around the house!
- Dental floss- Yep, dental floss! You can gently slide a piece under old prints that are stuck to album pages to remove them without damage.
It’s also a great idea to set up a dedicated space for your photo organizing. A card table, spare desk, or quiet corner of your office works well (somewhere your in-progress piles won’t get disturbed!). Having a consistent spot makes it easier to pick up where you left off and keeps everything contained as you work through the project.
Set Up a Photo Organizing System
Before you dive headfirst into organizing, it’s important to settle on a system. Start by pulling out a few boxes and photo albums and taking a quick scan of what you have. Think about the best way to group your photos so it feels natural for your collection. In this post, I recommend organizing by date in chronological order, and then sorting more specifically.
Here are some ways you might choose to group your photos, depending on what fits your archive best:
- Decade– Think big picture (1980-1989, 1990-1999, and so on)
- Year– Organizing by individual year can be helpful if your photos are already dated or easy to identify (you can always start with decades and get more granular later)
- Era– Childhood, high school, college years, etc.
- Category– Holidays, birthdays, vacations, school events, sports, and more
- Person– This can get tricky since many photos will feature multiple people, but it may be helpful if you’re planning to divide the collection among family members
- Event– Trips, weddings, graduations, and reunions
- This post has 20+ more category ideas!
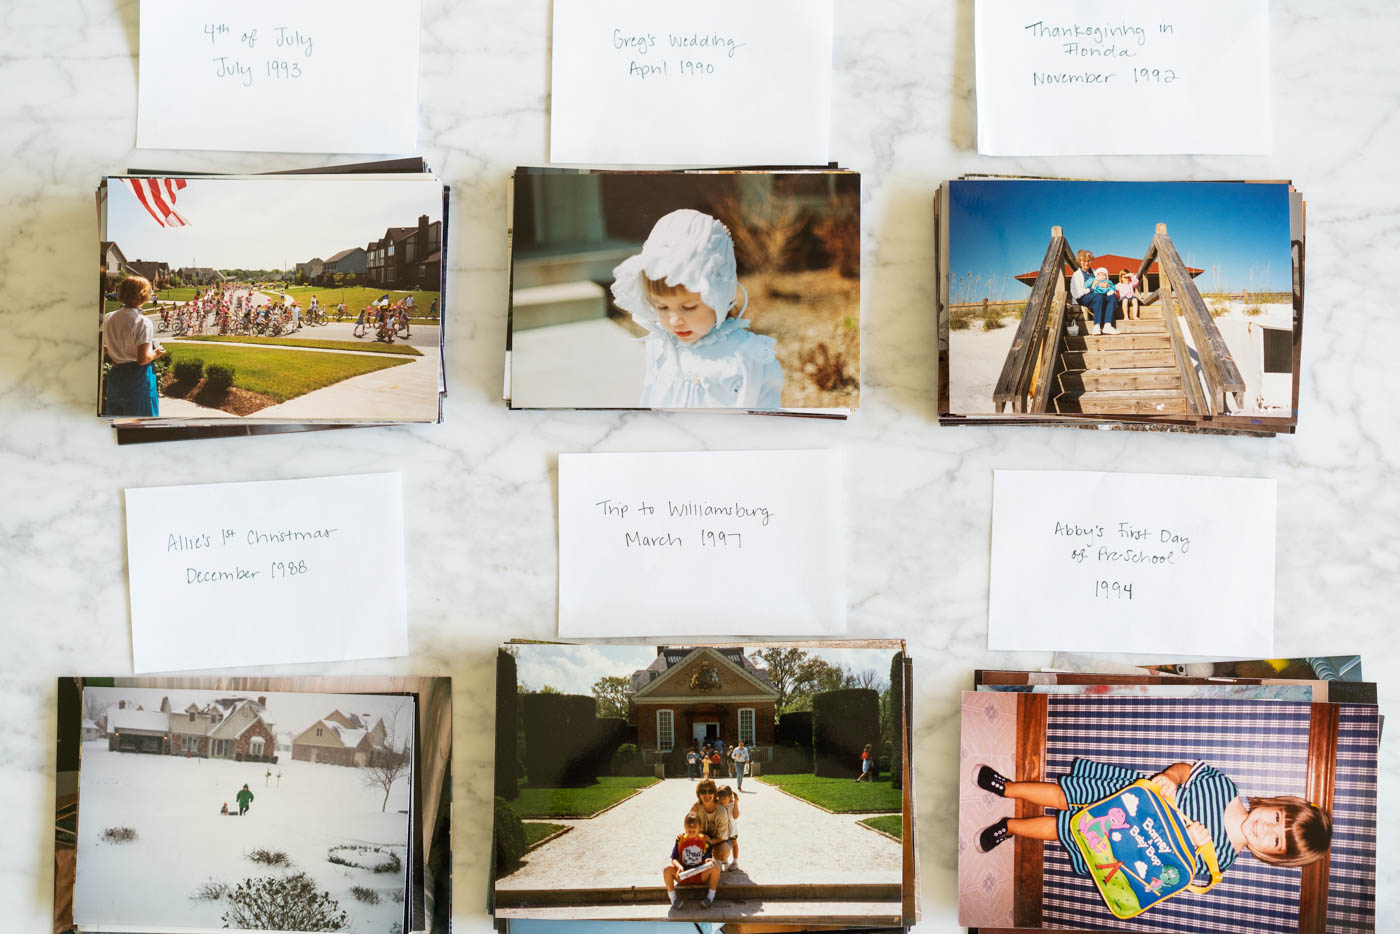
For our family archive, organizing chronologically by year, month, and event made the most sense based on our end goal. If that’s your goal too, start with broader categories like decade or era. Once everything is loosely grouped, you can go back and sort photos into more specific events and timelines. Starting broad keeps the process manageable and helps you avoid overwhelm early on!

How to Organize Printed Pictures
Once you’ve chosen your system, it’s time to start sorting! A great place to begin is with your existing photo albums or smaller boxes. Many are already loosely organized by year or event. If you’re ready to part ways with bulky or outdated albums, gently remove the photos (a piece of dental floss can help loosen any that are stuck).
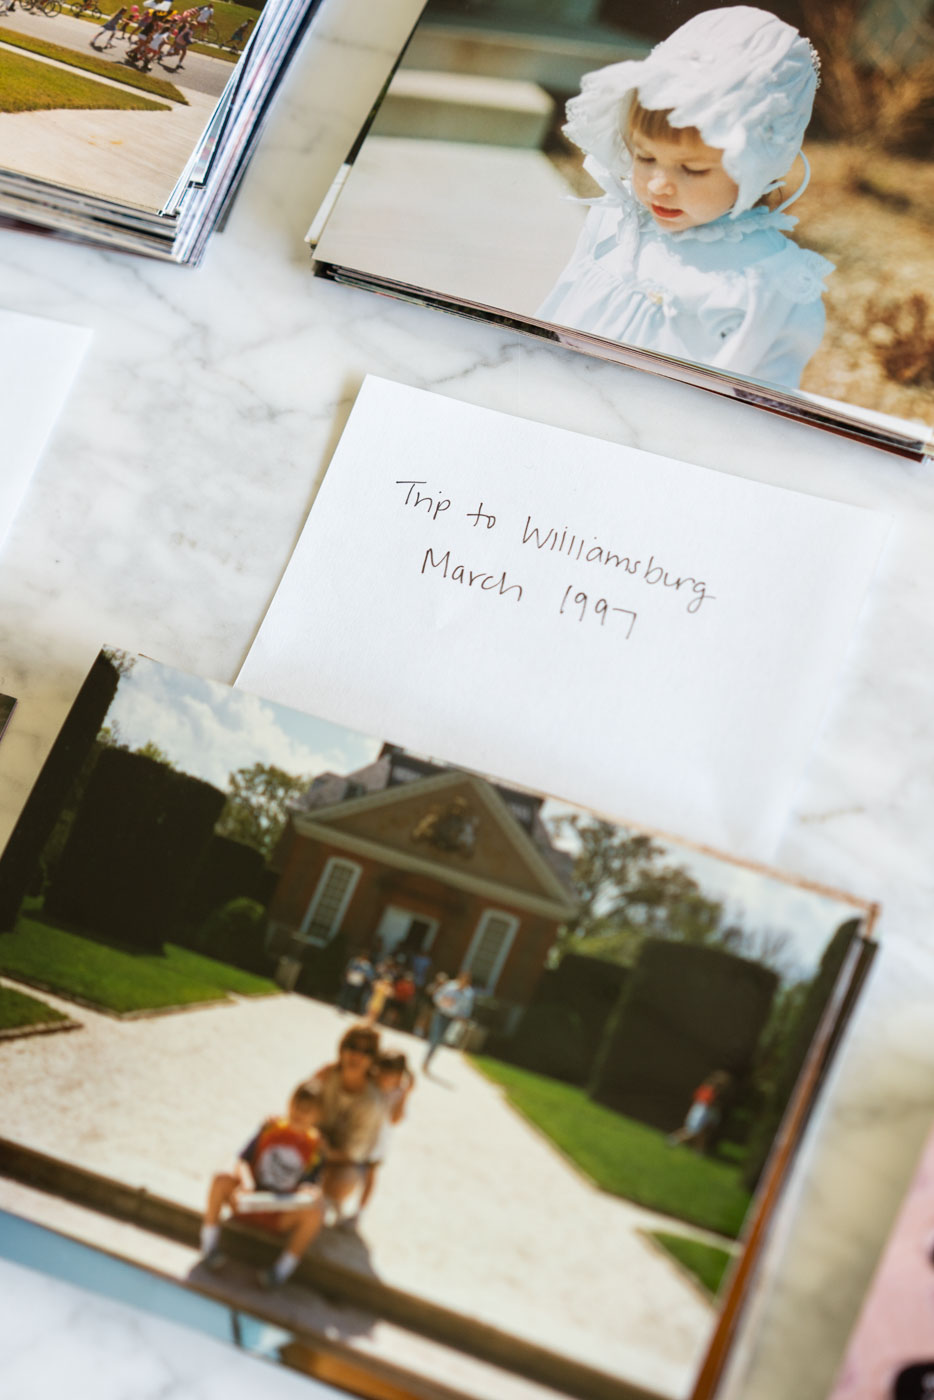
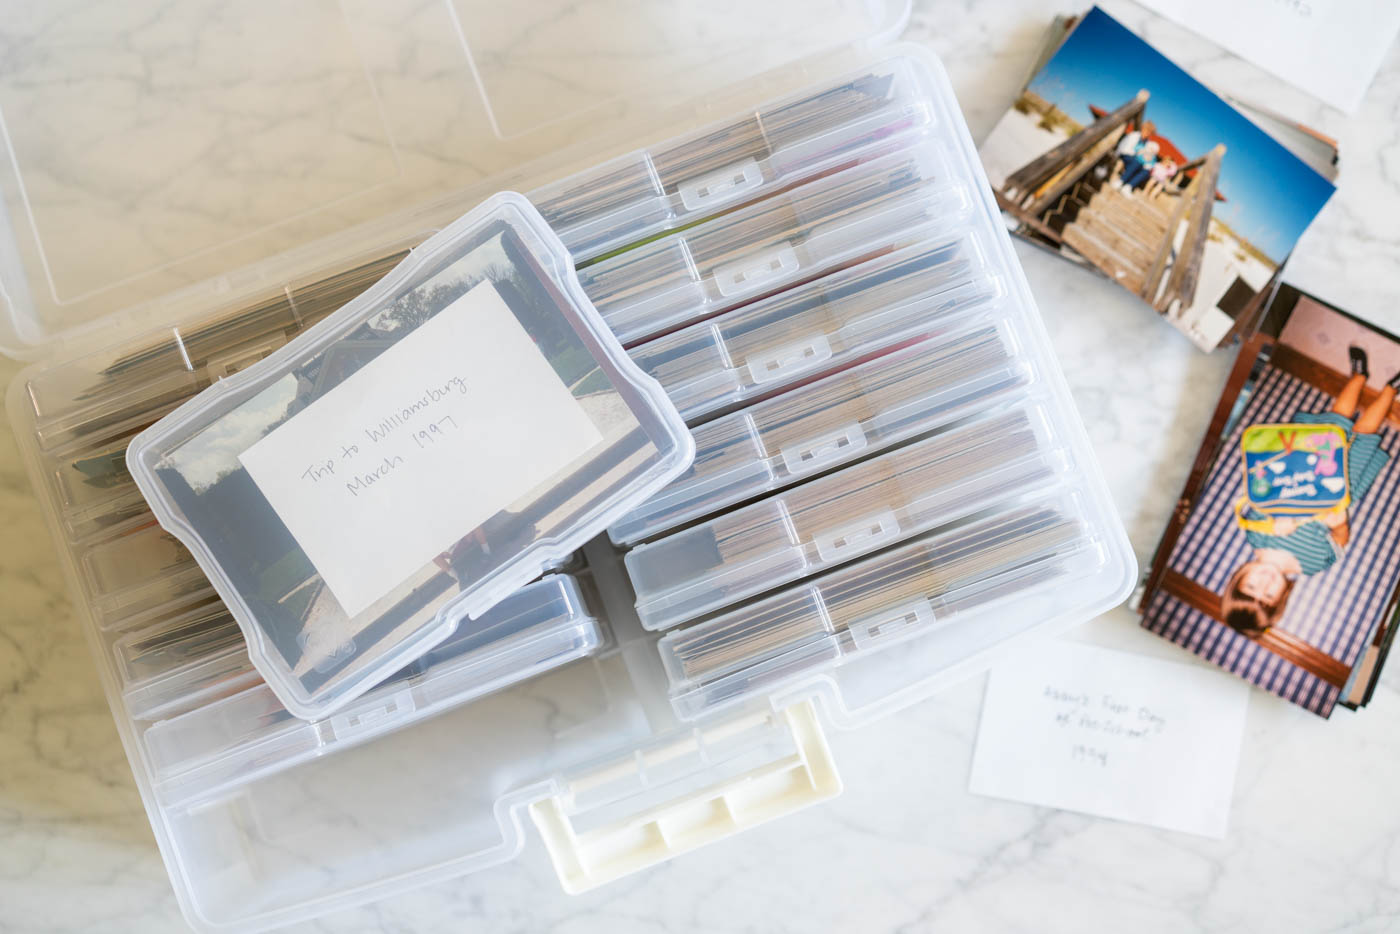
Start creating neat piles of photos that belong together. Label each stack based on your chosen system, whether that’s by year, event, category, or something else.
As you sort through your collection, be prepared to do some editing. Toss any duplicates, blurry shots, or photos that don’t contribute to the bigger story. Think of it like a Marie Kondo moment: hold each photo and ask yourself, “Does this bring me joy? Will I enjoy looking at it again and again? Does it capture a meaningful memory or help tell the story of the moment?” These quick questions will help you confidently decide what’s worth keeping and what can go.
Now your job is to organize, organize, and organize until each photo finds its place within your system. Depending on the size of your collection and how often you chip away at it, this part might take a few weeks or months. For my mom and me, the entire organizing and scanning process spanned about two years since we worked on it little by little. Find a pace that works for you, and make it happen!
Store Your Photos Safely
Once you’re happy with your organization (whew!), it’s time to safely store your prints.
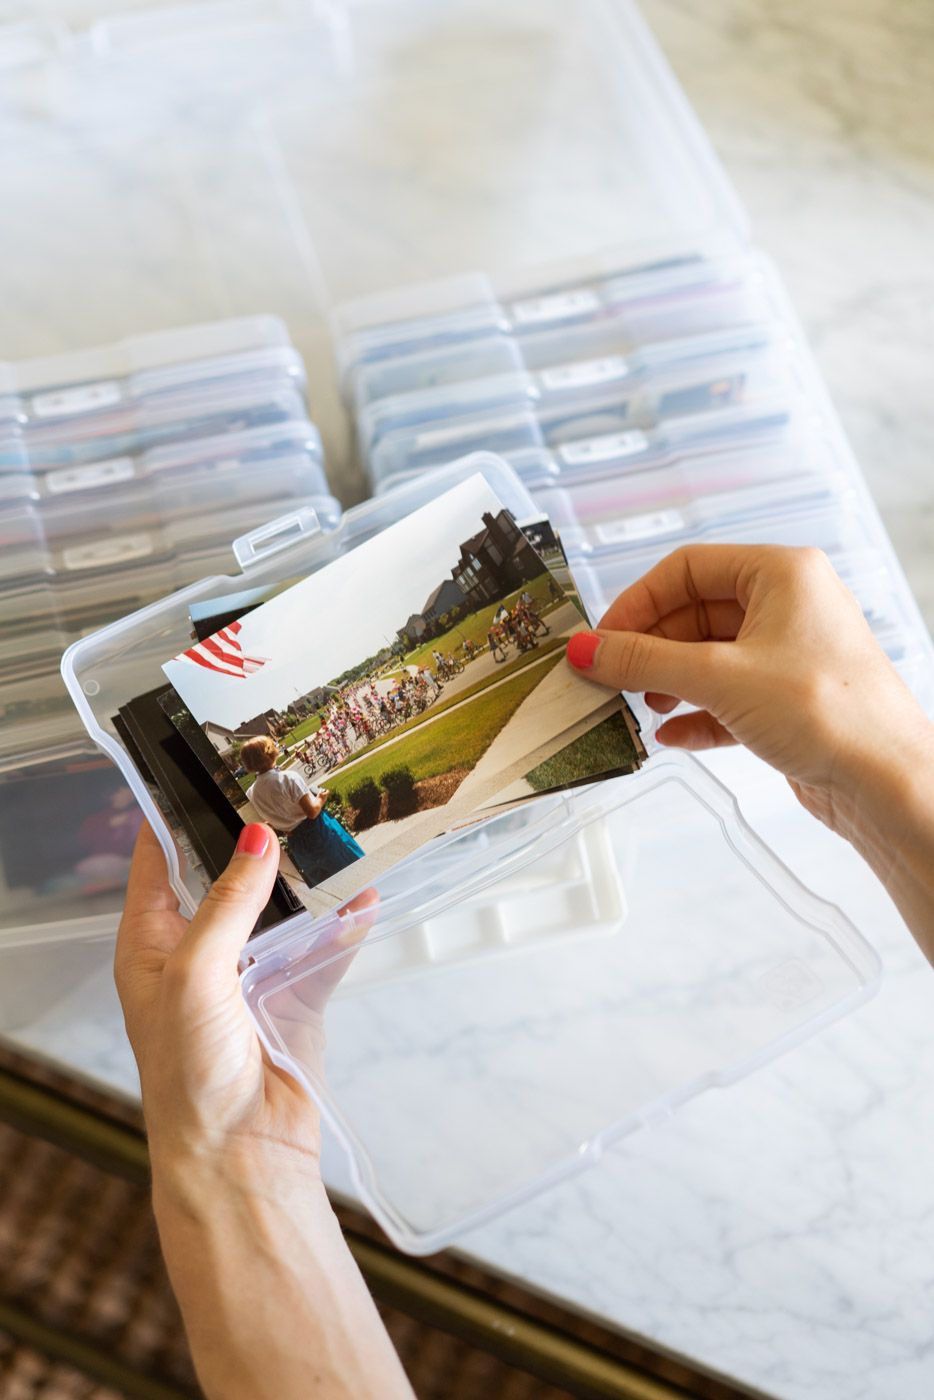
These photo storage carriers are the best photo storage solution I’ve found. They’re acid-free, stackable, sturdy, and make it super simple to organize decades of photo prints.
Each case inside holds 100 photos, and the full box can store up to 1,600 (they also make a 12-case version that holds 1,200). You can label the tops for easy viewing from above or label the fronts.
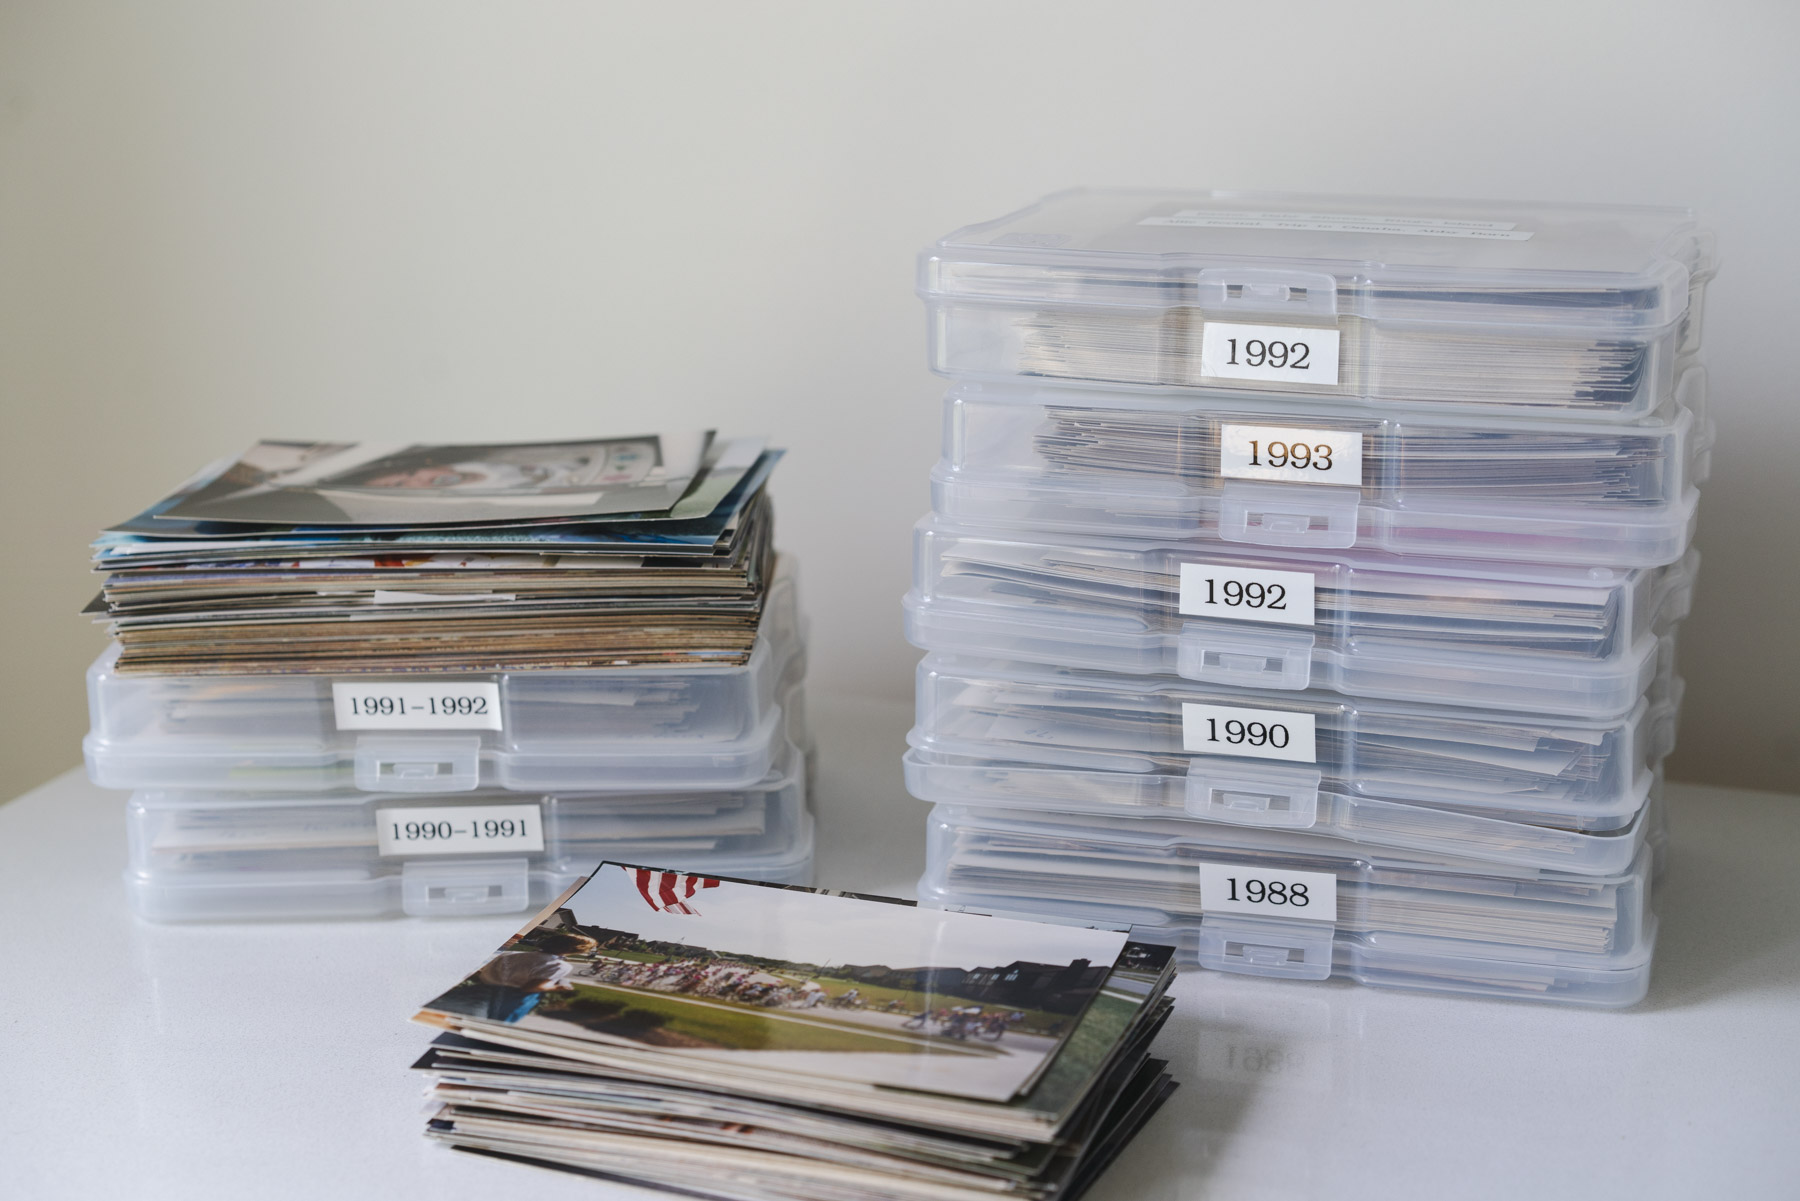
You can also grab the 5×7 storage box (which I also own and love), and the individual cases in 4×6 and 5×7 sizes if you don’t need the full set or have overflow.
Here are the best places to buy Iris carriers:
The Container Store – My go-to! They sell the 16- and 12-case carriers for 4×6 photos, the 6-case for 5x7s, and the individual cases. Shop at The Container Store →
Target – Offers a 2-pack bundle of the 16-case carrier if you’re organizing a lot at once. They also sell a 10-pack of the individual 5×7 cases.
How to Organize Memorabilia and Other Types of Media
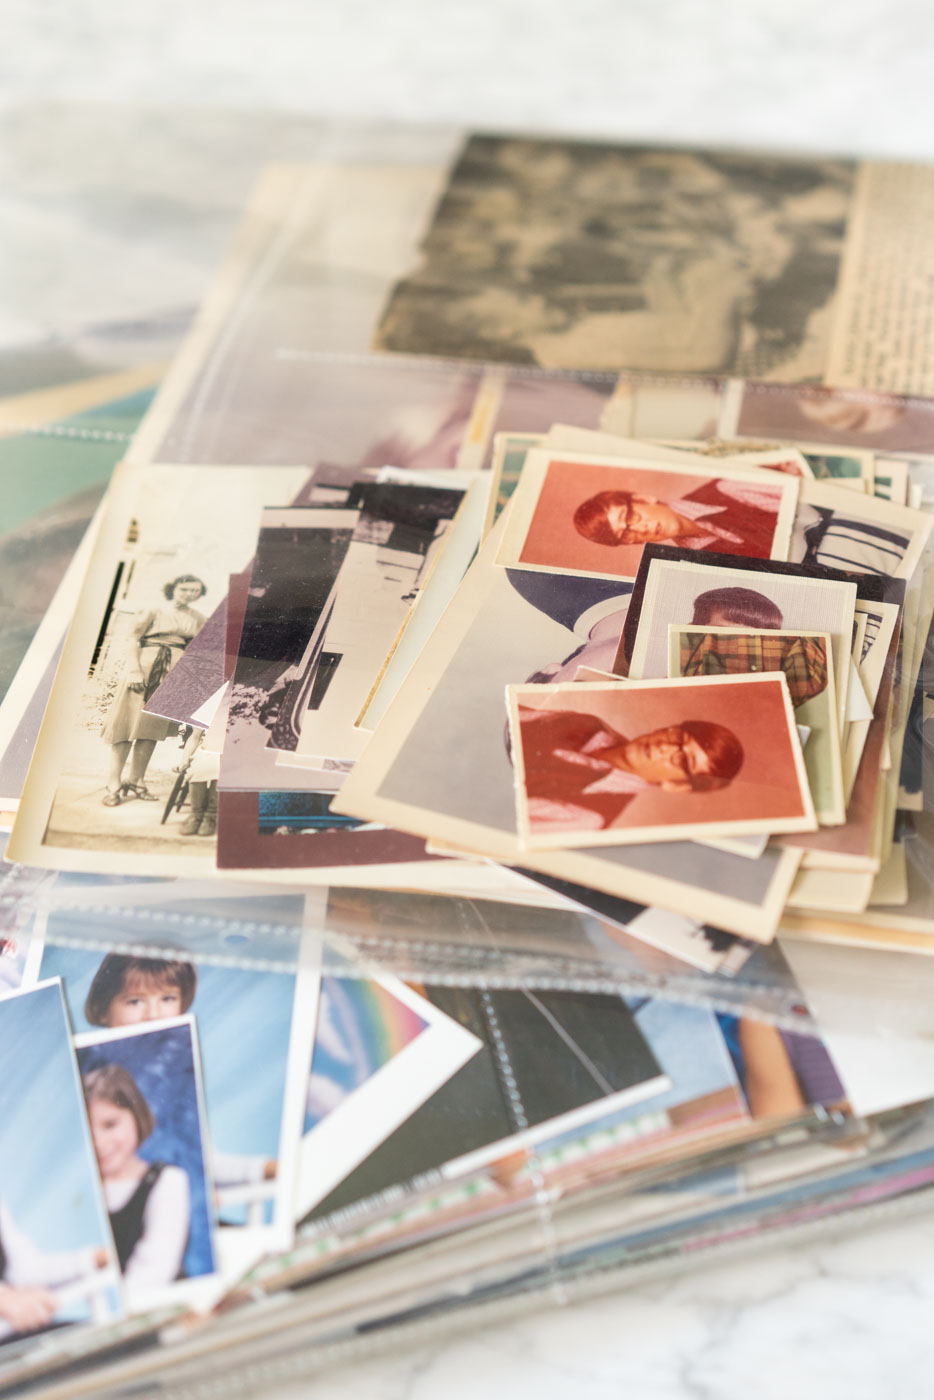
You’ll also likely come across photo negatives, Polaroids, damaged or faded prints, VHS tapes, CDS, and paper memorabilia. Set these aside in clearly labeled piles so you can scan, restore, or convert them later if needed.
- Try a case like this to store tapes, DVDs, and CDs
- For photos that aren’t a standard size, archival boxes like these are a great option
If your main goal is to organize your printed photos first, don’t stress about tackling everything at once. You can always come back to organize important papers and memorabilia once your photo archive is in a good place.

The Easiest Way to Scan and Back Up Your Photos: The Scanning Service We Loved
Once you’ve safely stored your physical photos, creating digital backups by scanning them is the next important step. I know, I know. After organizing your entire family collection, the last thing you probably want is to start organizing it again digitally! But it’s worth it for peace of mind and easy access. Plus, since you already did the hard work of categorizing and sorting, this part should be pretty straightforward. Remember, you don’t have to do it all at once.
And if you’re thinking, “No way am I buying a scanner and spending my time scanning photos and negatives,” don’t worry. There are plenty of photo scanning services that will handle it all for you!
My mom and I used ScanMyPhotos for both their Print Scanning and Carousel Slide Scanning services to digitize our family archive. It was super easy! They scanned everything in order, made small tweaks like image rotation and basic restoration, and loaded everything onto a USB drive. You can even add signature confirmation for extra peace of mind when shipping your originals. Highly recommend if you’re looking for a trusted photo scanning service!
Ways to Enjoy Your Organized Photos
Once your photos are sorted and safely stored, it’s time for the fun part- actually enjoying them! A family archive shouldn’t be stuck in a box forever. It should be a living, breathing part of your home and your story. Here are a few of my favorite ways to bring your collection into everyday life:
- Scan and share your favorites with family members to reminisce together (a perfect excuse for a group text full of laugh-cry emojis and new stories you haven’t heard)
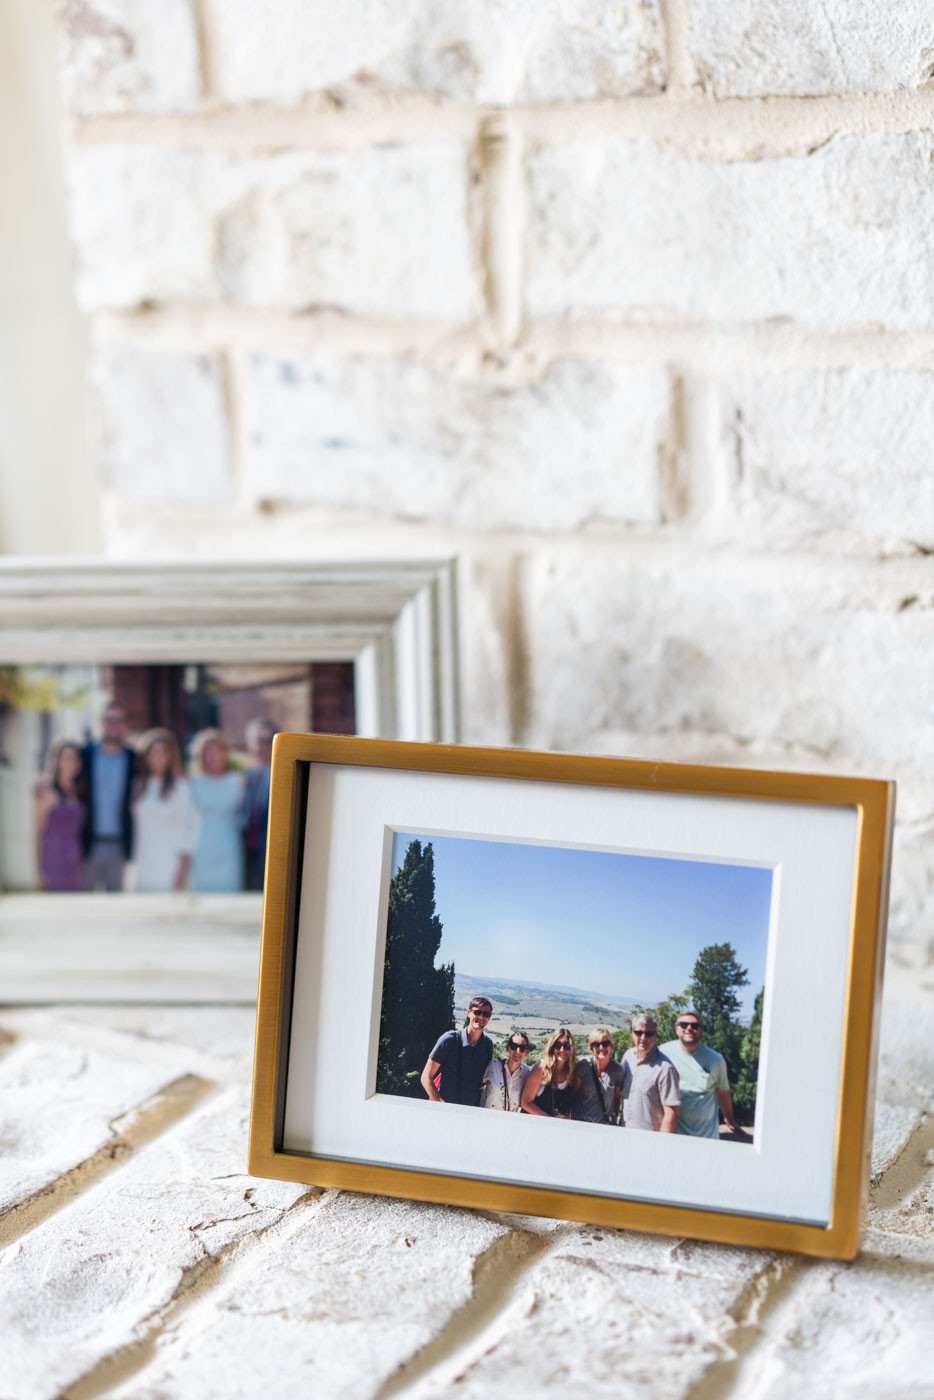
- Frame your favorite prints and create a gallery wall or pop them in frames around your home
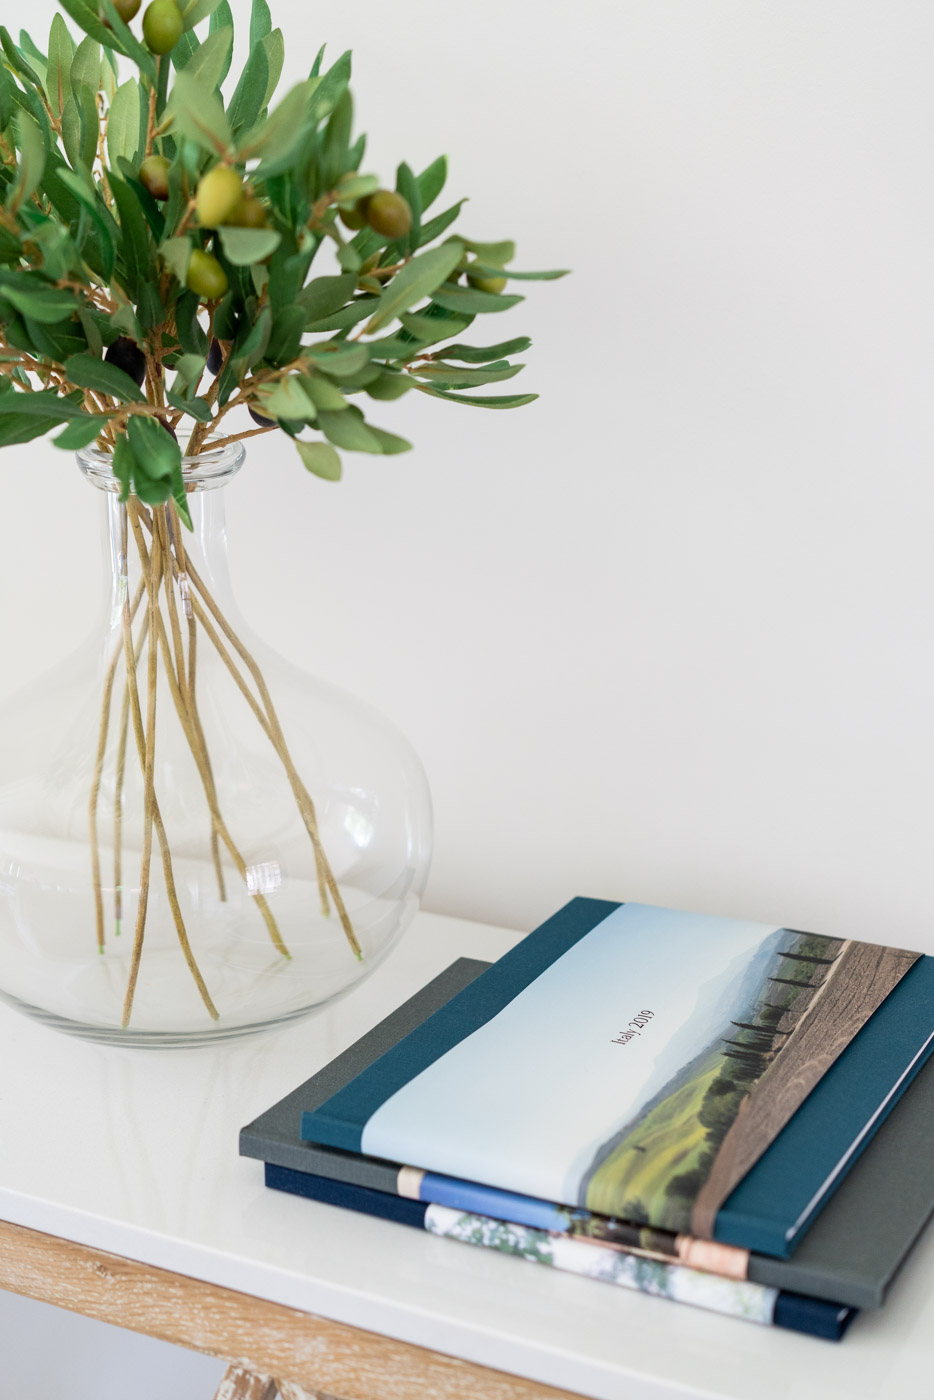
- Design modern photo albums with Artifact Uprising. Their 11×8.5 Hardcover Photo Book is my go-to for clean, beautiful albums. I made our wedding albums (yes, plural- we had two weddings thanks to COVID!) and travel books using their tools.
- If scrapbooking is more your style, I’m a big fan of pocket scrapbooking. Grab a 3-ring photo album and slide your prints into clear pocket pages. At the time I’m updating this post in 2025, the selection is a bit more limited than it used to be, but Scrapbook.com and Amazon still have some options.
Wrapping Up
I hope this system helps you organize your old family photos, and most importantly, actually enjoy them! It’s not a quick process (trust me, I know!), but it’s so worth it to keep your memories safe and easy to revisit. Take it one step at a time, give yourself some grace, and don’t stress the timeline.
Ready to take on your digital photo chaos next? Read my post about how to organize your iPhone photos. Or, want a closer look at my favorite print storage solution? Check out my Iris photo case review!
Any questions? Email me at abby@abbymurphyphoto.com or drop a comment below!


[…] *tips from Abby Murphy […]