


Is your digital life feeling totally unorganized? It’s one thing to organize your physical possessions at home but quite another to sort your digital life. For me, organizing my physical photos and mementos comes much easier than organizing my digital photos, files, and programs! But, as the world goes more and more virtual, I’ve learned to transfer my physical organizing skills to the digital world. If you want to learn a simple system for organizing your digital photos, you’re in the right place. Let’s get to organizing!
Steps to Organizing Your Digital Photos
1. Put an Organizing Date on Your Calendar
It may not be fun or sexy to put “organize digital photos” on your calendar, but believe me when I say this is the most crucial step of the process! Like any organizing, digital photo sorting takes consistency. Luckily, once you have the following system in place, you’ll only need to reserve 10-15 minutes a month to sort your digital photos. Choose the frequency that works with you. If you take a lot of photos, it might help you to organize every week. Maybe you just need to do it once a month. Either way, put that organizing time on your calendar now as a recurring event and you’ll be much more likely to do it!
2. Create Your Folders
To get the hang of this photo organizing system, start with the current year. Create one folder for the current year. Inside, create one folder for each month of the year. I like to label them first with the number of the month and then the month name to keep them in order. It’s important to date every folder in the same way so nothing gets lost in the shuffle and they’re easily searchable.
01_January
02_February
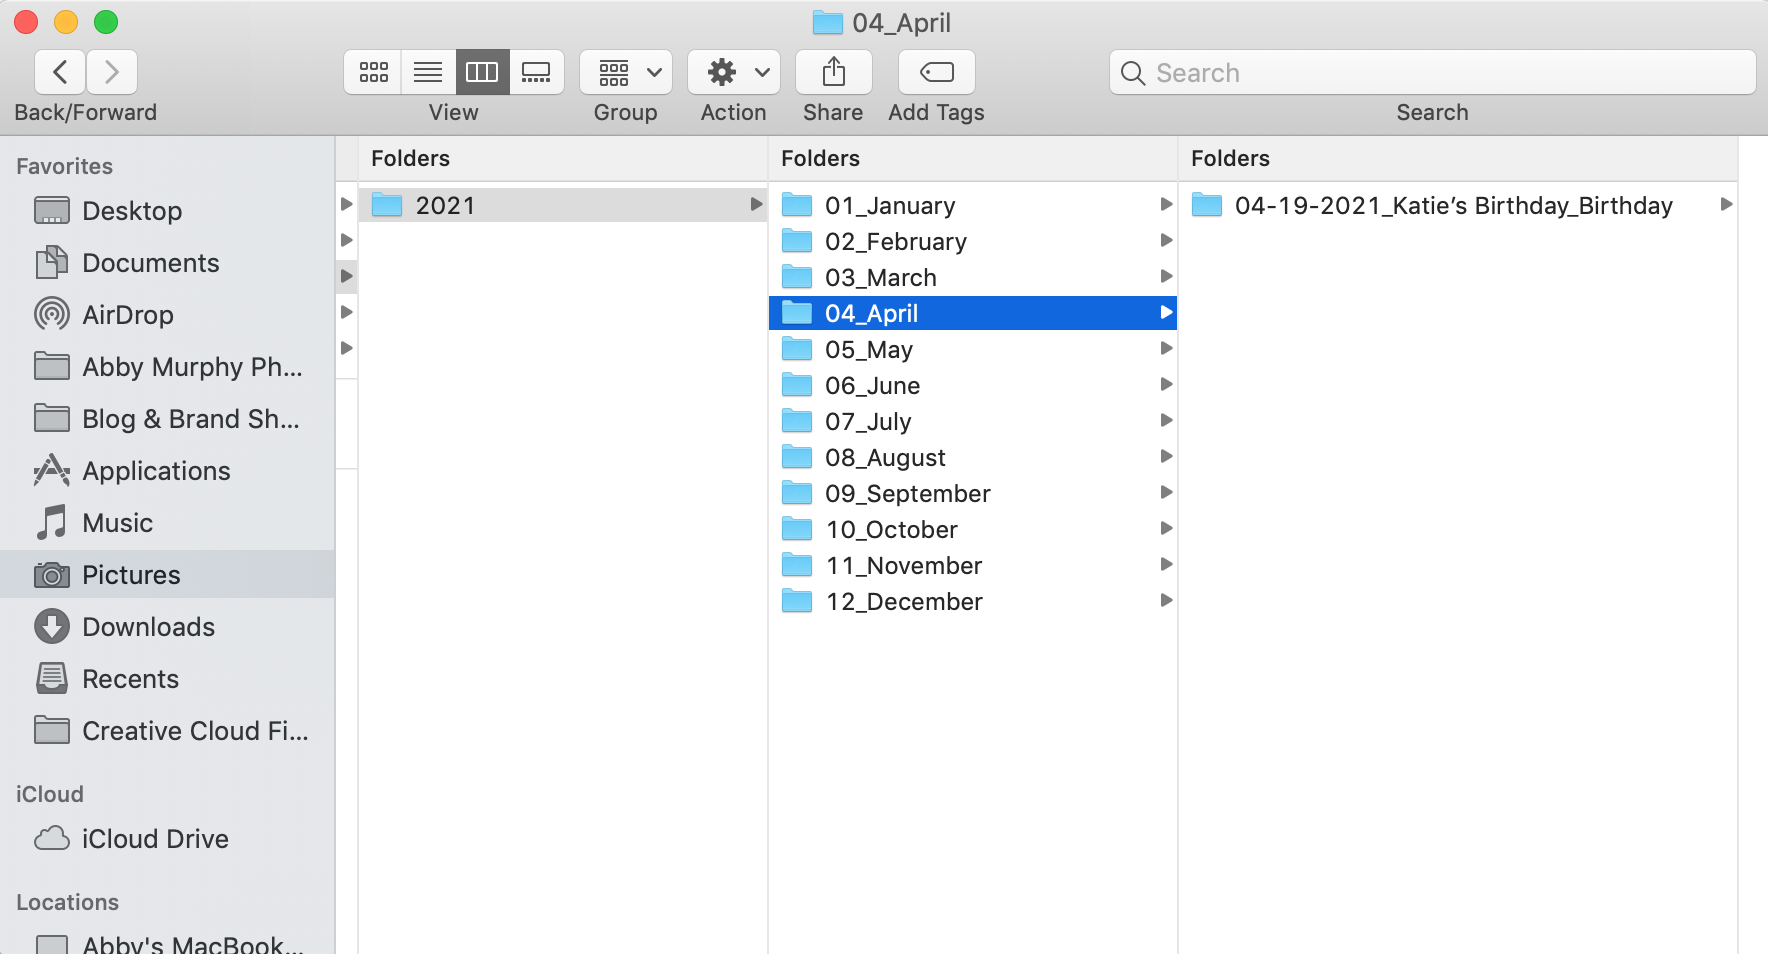
If you want to go one step further, create folders inside each month for big events you know are already happening, like birthdays and holidays. You can do this as you go, but if you’ll feel better saving yourself time later, do it! I like to label each event folder with the date and event name.
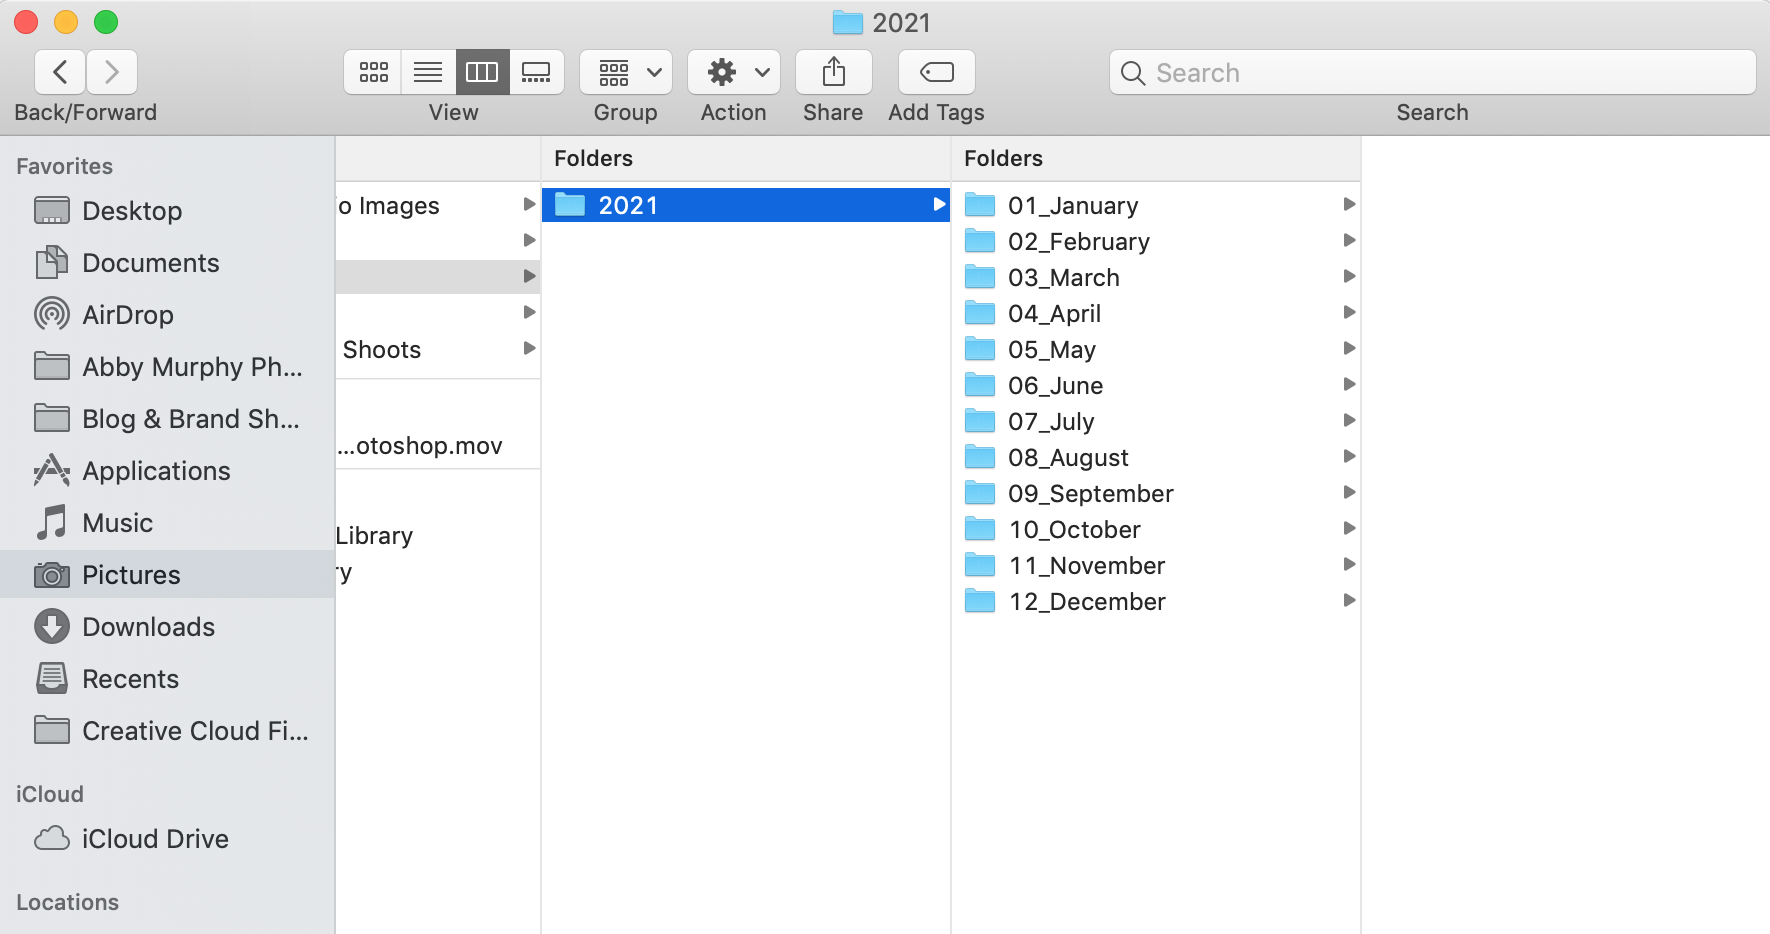
Here’s exactly how I name my folders:
04-19-2021_Katie’s Birthday
12-25-2021_Christmas
You could even add another section for event type so you can easily sort them later:
04-19-2021_Katie’s Birthday_Birthday
12-25-2021_Christmas_Holiday
I never re-name my image files since the folders are named and organized. You absolutely can if you want to, but I find it to be an unnecessary step.
If you have previous years of photos you’d like to organize, start by creating this folder system. You’ll find it much easier to place photo files where they belong if you’ve got the framework of folders set up already. Organizing past images takes time, so don’t put pressure on yourself to organize your whole digital life at once. Schedule in your organizing bit by bit, and eventually you’ll get caught up!
Boom, you’ve created your organizing system! Easy, right?!
3. Back, Back, Back It Up
Your beautiful, image organizing system is not complete without backups, so no skipping this step! You absolutely need at least one backup of your files, in addition to where they always live (bonus points if you also put them in a third location!). Just like your printed photos could be lost in a flood, fire, or move, your digital photos could vanish with a hard drive crash or computer mishap. You will have peace of mind knowing that you have multiple copies.
Start with cloud storage for your backups. There are plenty of options out there that are great for storing photos. Try Adobe Creative Cloud, Google Photos, Dropbox, or Apple iCloud Drive. Check out a few options to find one that is easiest for you to use and has the features you’d like. There are also services like Backblaze and iDrive that will backup your whole computer hard drive and/or external drives to the cloud.
I also love using hard drives for my backups (I use this G-Technology drive and this Seagate drive specifically). Hard drives typically come in storage capacities of 500gb and up. I don’t recommend storing everything on one large drive in case it crashes (unless you have a backup of the backup!). I have multiple hard drives for various years of photos, but I’m a photographer that needs lots of space to hold client files! If you’re just storing personal JPG files, a 500gb or 1TB drive would be plenty of space. Look for one with an SSD drive, USB 3.0 or faster, one that is formatted for PC and Mac (or the one that you use), and solid reviews.
4. Organize Your Digital Photos!
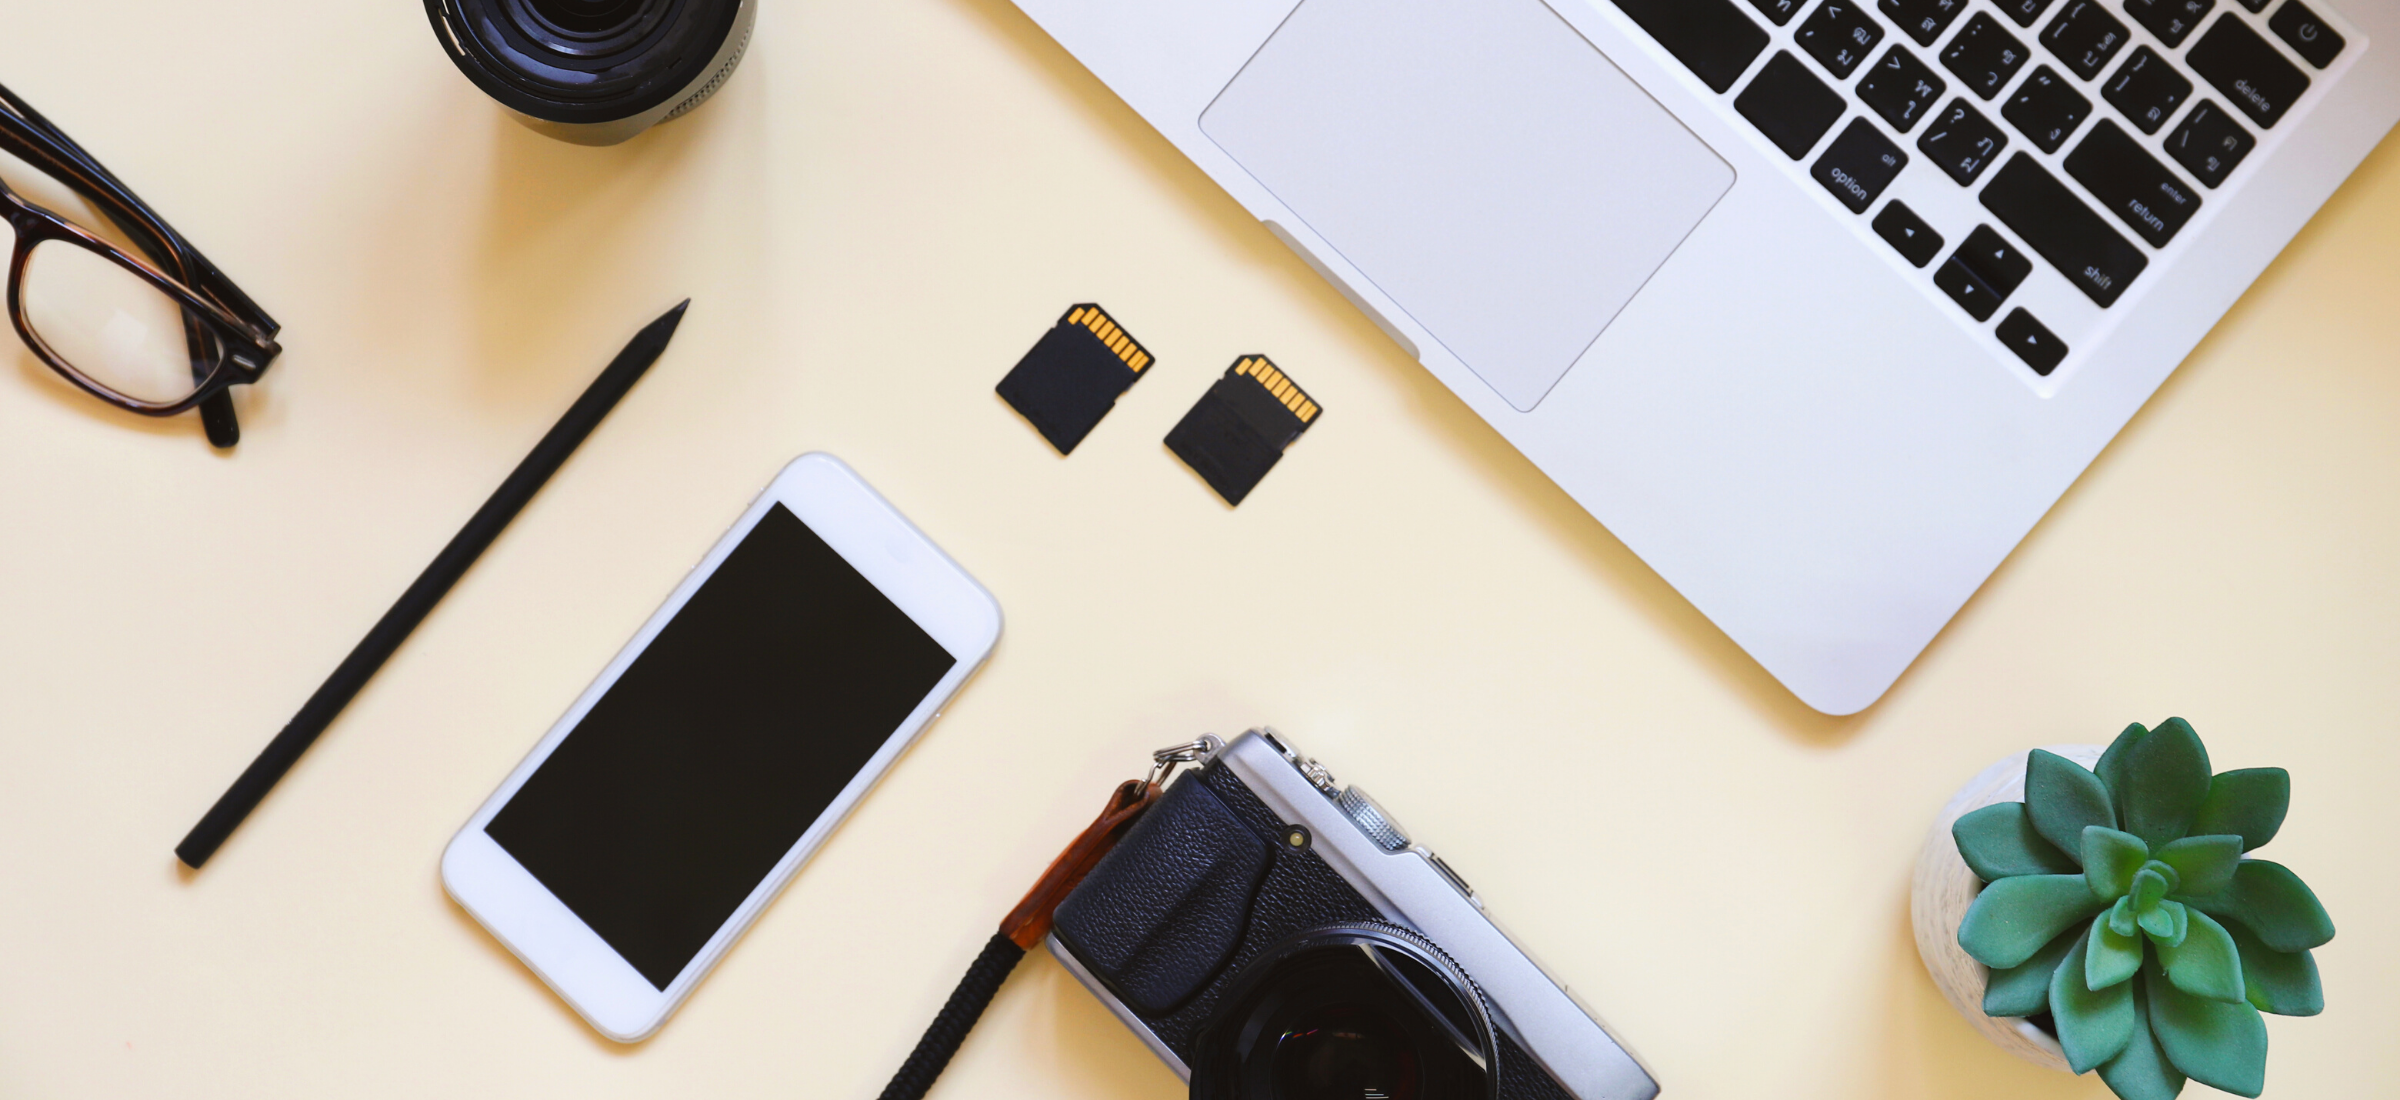
Remember that organizing date you set for yourself? Time to put it into action! Every week or month, grab your memory cards and iPhone and open your photo folders. Here are the exact photo organizing steps to follow:
1. Open your photos in a photo viewer program, like Adobe Bridge or the Photos app so you can see what photos you’re working with.
2. Create folders dated and labeled with your event information. It always helps me to open my calendar to see what events happened on what days, but you can also look at the file information to see what day and time the photos were taken.
3. Drag and drop your photo files into their designated month and event folders.
4. Plug in your hard drive or open up your Cloud backup. Backup those files you just organized!
5. Do a happy dance because your photos are organized, safe, and protected!
Doesn’t it feel so good to know you have a plan for organizing your digital photos? I sometimes feel frazzled by the amount of digital information I have to organize, but knowing I’ve implemented these systems helps to alleviate the overwhelm! If you need help organizing your printed family photos too, I’ve got you covered with this post next.


+ SHOW comments
Add a comment